Author
Suzanne is an Owner/Designer
Author
Suzanne is an Owner/Designer
A zone-based fridge organization system that treats the inside of your refrigerator like a floor plan, making it easier for your whole family to find food, eat healthier, and waste less.
A zone-based fridge organization system that treats the inside of your refrigerator like a floor plan, making it easier for your whole family to find food, eat healthier, and waste less.

*This blog contains affiliate links.
The Inside of My Fridge Is Not Sentimental
As a designer, I'm selective with where I place personal pictures and art. Awards and diplomas are for offices. Novelty knick knacks are for shelf styling. Personal pictures of my family go in bedrooms where they can be treasured. Communal rooms are for stylized art for guests to enjoy.
With onnnne exception.
My refrigerator.
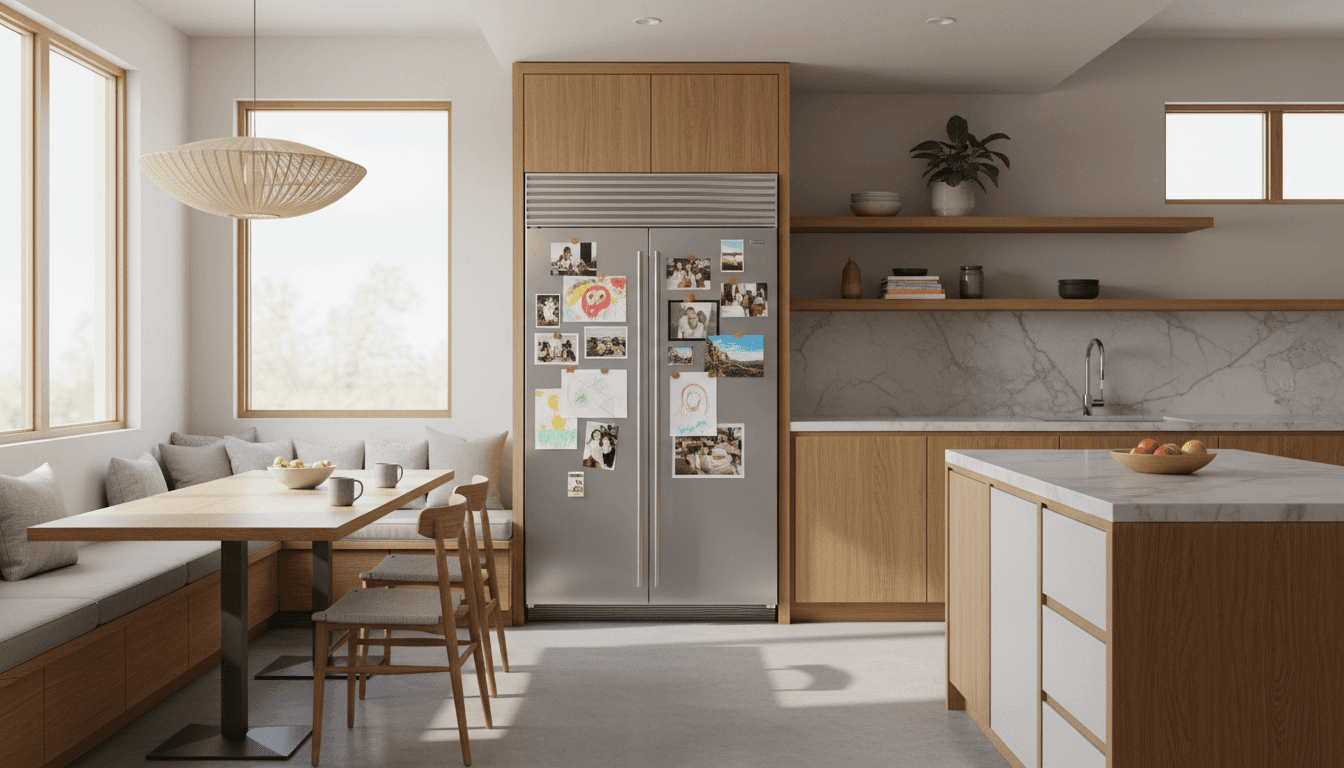
The outside of it, I mean. That's where all the kid artwork lives, the random funny family pics, the travel postcards from that trip to Savannah where my daughter tried shrimp and gagged so dramatically a waiter came over. My kitchen is styled, but the outside of that fridge is where I want to see life.
The inside, though. That's different.
The inside needs to function for my family. Not nostalgia in there. Just me looking to feed everyone, or more likely, my family looking to feed themselves. My 9-year-old standing there with the door open for 47 seconds, cold air pouring out, scanning like he's browsing Netflix.
So I started treating the inside of my fridge the way I treat a room. Zones. Flow. Making sure the things you reach for most are the easiest to grab.
And honestly, it changed how we eat.
Here are some ways to make it work for you.
---
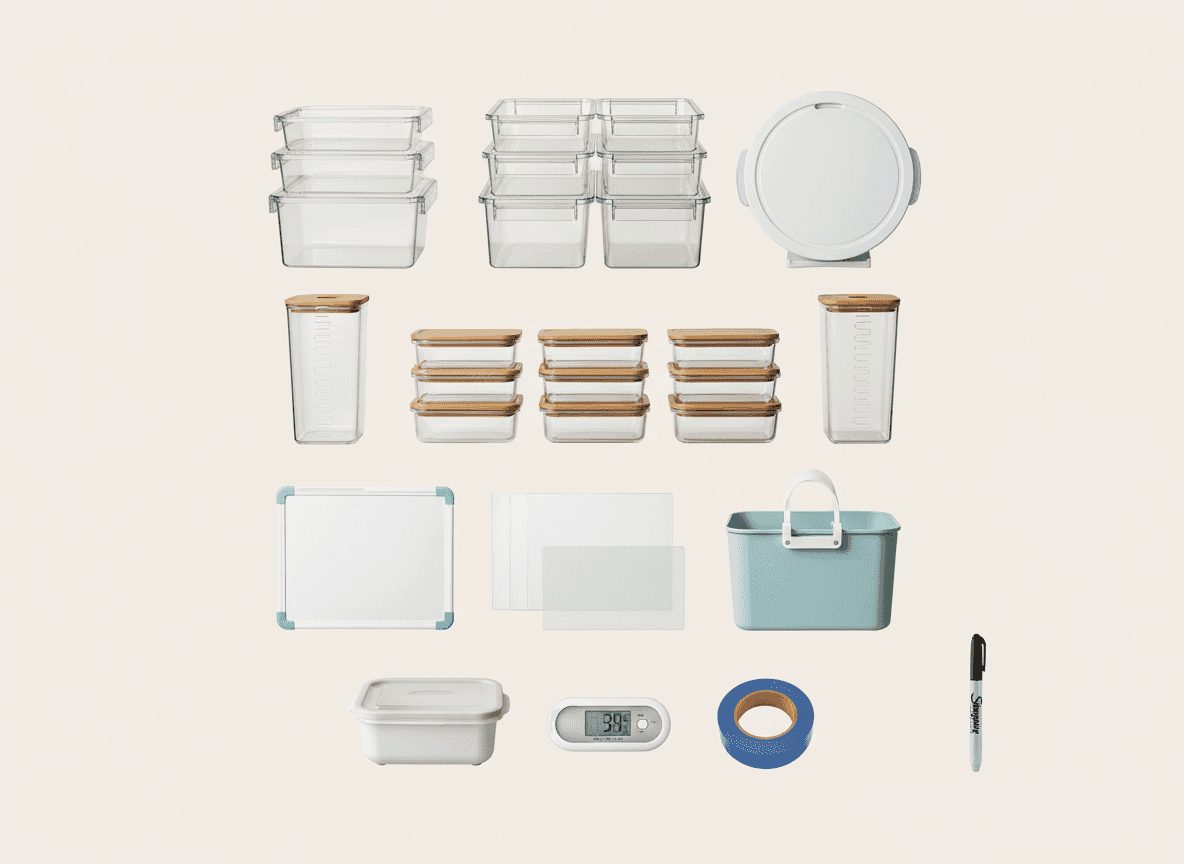
Shop This Room (Well, This Fridge)
Before we get into the system, here's what makes it actually hold together week after week:
The bins that make zones possible (clear, stackable, easy to wipe down)
A lazy Susan for condiments (the thing that stops the "where's the mustard" conversation forever)
Glass meal prep containers (you can see what's inside without opening them, which matters more than you think)
A magnetic dry-erase board for tracking what needs restocking
Removable fridge shelf liners (for when the yogurt inevitably tips over)
A kid-friendly snack bin they can pull out on their own
Egg holder with a lid (ditch the cardboard carton, trust me)
---
Think of Your Fridge Like a Floor Plan
When I design a living room, I don't just throw furniture in and hope the traffic pattern works. I think about what someone does first when they walk in. Where their eyes go. What they need to reach.
Your fridge is the same thing.
Every time someone opens that door, they're making a decision. Usually a fast one. And if everything is crammed in randomly, the decision defaults to "I don't know what we have" or "I'll just grab the cheese."
So instead, we zone it.
---

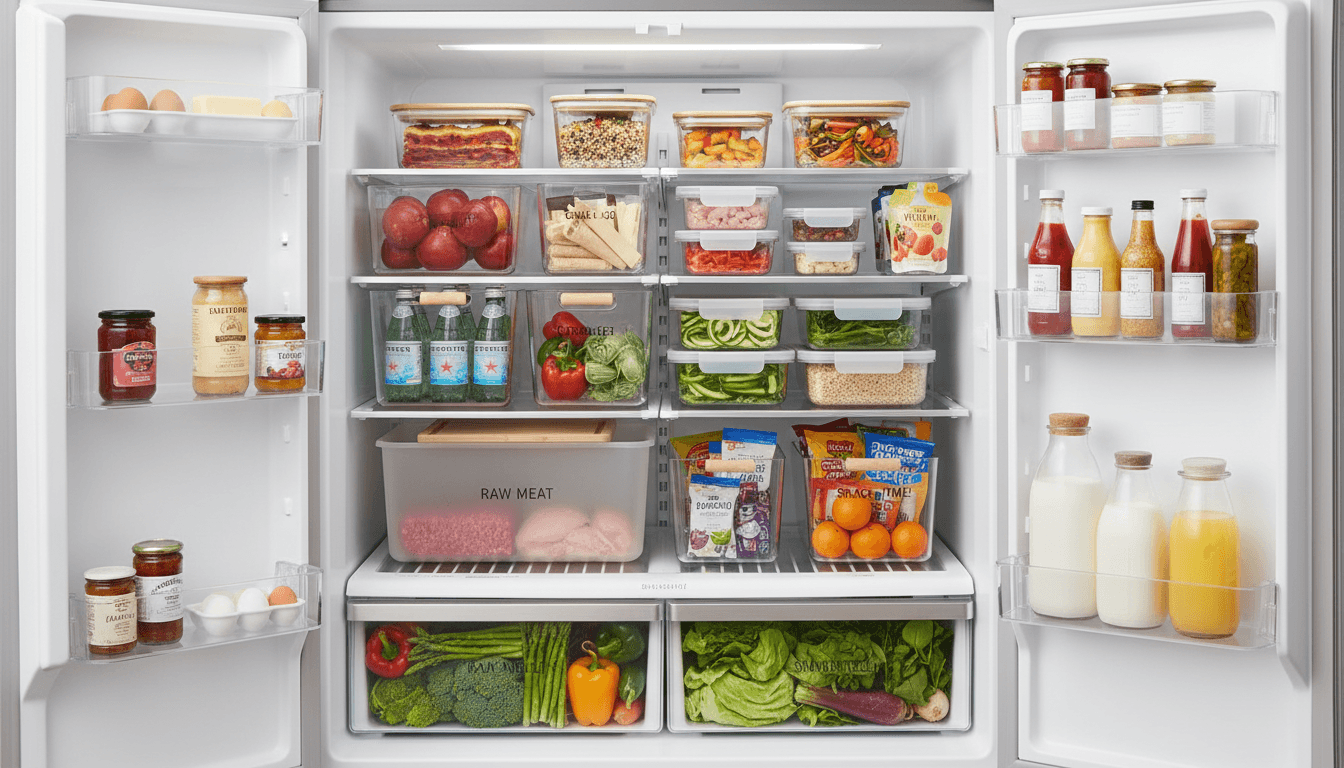
The Five Zones
Zone 1: Grab-and-Go (eye level, front and center)
This is the most valuable real estate in your fridge. Right at eye level, front of the shelf. This is where you put the things your family reaches for daily without thinking.
Drinks. Yogurt. Cheese sticks. Fruit that's already washed.
For us, this shelf has a clear bin with string cheese, a small container of washed grapes, and whatever drinks are chilled. My kids can open the fridge and grab something without asking me. That's the whole point.
Zone 2: Leftovers (upper shelf, visible)
Leftovers go on the upper shelf in glass containers. Not tucked in the back. Not buried under last week's takeout box.
Upper shelf, front row.
Here's why: leftovers are the first thing to get wasted. They get pushed back, forgotten, discovered two weeks later in a state that makes you question your life choices. Keeping them visible and at the top means they get eaten. Which is the point.
I also keep a small piece of masking tape on each container with the date. Nothing fancy. Just a roll of painter's tape and a Sharpie in the kitchen drawer. Three days is my rule. After that, it goes.
Zone 3: Meal Prep and Cooking Ingredients (middle shelf)
This is where the raw ingredients for this week's meals live. The chicken you're thawing for tomorrow. The vegetables you prepped on Sunday. The block of parmesan you'll grate over pasta on Wednesday.
I keep raw meats in a dedicated bin with a liner, always on the lowest shelf of this zone or in the dedicated meat drawer. Raw meat should never sit above ready-to-eat food. That's not me being fussy. That's just food safety. A leak from raw chicken onto your strawberries will ruin a Tuesday fast.
Quick note on airflow: don't overpack this shelf. Fridges need air circulating to keep everything at the right temperature. If you're playing Tetris to close the door, you've got too much in there. Cold air needs to move.
[IMAGE 2: Close-up of middle shelf showing meal prep containers neatly arranged with visible contents, a small bin for raw meat on the lowest level, and breathing room between items]
Zone 4: Condiments and Sauces (door shelves + lazy Susan)
The door is the warmest part of the fridge, which is why milk shouldn't live there (I know, I know, everyone puts milk in the door). The door is perfect for condiments, sauces, dressings, and anything with enough vinegar or preservatives to handle slight temperature swings.
A lazy Susan on the top door shelf is the single best $12 you'll spend. You spin it, you find the sriracha. No more digging behind seven bottles of salad dressing you bought because you forgot you already had three.
For the bottom door shelf, that's where the tall bottles go. Ketchup, soy sauce, the bottle of ranch that weighs more than a newborn.
Zone 5: The Kids' Zone (lowest shelf)
This one changed our mornings.
The lowest shelf gets a bin with a handle that's stocked with approved snacks and drinks. My kids know they can grab from that bin anytime without asking. Applesauce pouches. A small water bottle. Cheese. Whatever I put in there that week.
It's at their height. They can reach it. They can pull the whole bin out like a drawer, pick what they want, and slide it back.
This alone cut the "Mom, can I have a snack?" frequency in half. Which, if you have kids, you know that question comes roughly every 11 minutes.
---
The Container Rules
Not all containers belong in a fridge. Here's what works and what doesn't.
Clear. Always clear. If you can't see what's inside, it gets forgotten. That's just how brains work. Those gorgeous ceramic containers look beautiful on a counter but they're a black hole in a fridge.
Stackable. Vertical space is real estate. Stackable bins let you use all of it without things toppling.
Easy to wipe. Smooth surfaces, no weird grooves or textures that trap grime. You want to be able to take a bin out, wipe it with a damp cloth, and put it back in 30 seconds.
Right-sized. Oversized bins waste shelf space. Measure your shelves before you buy. I measured mine at 11 inches deep and 15 inches wide, and knowing those numbers saved me from returning three sets of organizers. Grab a measuring tape and just check.
---
The Labeling System (Keep It Stupid Simple)
You do not need a label maker for your fridge. You just don't.
Painter's tape and a Sharpie. Date on leftovers. A small label on each bin if you want ("snacks," "prep," "drinks"). That's it.
If you're someone who genuinely enjoys the label maker life, go for it. A small portable one does look cleaner. I won't pretend it doesn't. Just don't let the labeling project become the reason you never finish organizing the fridge.
---
The Restock Rhythm
An organized fridge without a restock habit is just a pretty fridge that slowly descends into chaos. I've watched it happen in my own kitchen approximately one hundred times.
Here's what works for us:
Once a week (Sunday or Monday): Full restock. Pull everything out. Wipe the shelves. Toss anything past its date. Restock the zones from your grocery run. This takes about 20 minutes. Put on a podcast. It goes fast.
Midweek (Wednesday or Thursday): Quick check. Top off the kids' bin. Move any leftovers that need eating to the front. Check the produce keepers. This takes five minutes.
That's it. Twice a week. It sounds like a lot until you realize you're already opening the fridge 14 times a day anyway. You're just being slightly more intentional about two of those times.
---
The "Before Guests" Reset
You know the moment. Someone's coming over in 20 minutes and you realize they might open your fridge for a drink and see the state of things.
Here's the three-minute reset:
Toss anything visibly past its prime (you know the items, don't think too hard)
Push everything toward the back, pull the "nice" stuff forward (the sparkling water, the fancy cheese)
Wipe down the front of the shelves where drips have accumulated
Close the door
It's not deep cleaning. It's staging. And honestly, that tracks with how I approach most rooms before company comes.
---
This is exactly what I do for clients. Want me to design your room like this? Whether it's a kitchen layout, a living room that actually works, or yes, a fridge system, I design with function first. Contact Me to get started, or take the Style Discovery to figure out your unique style.
---
A Few Food Safety Things (Lightly, I Promise)
I'm not a food scientist. I just don't want your family getting sick because of a layout choice.
Raw meat goes on the lowest shelf or in a contained drawer. Always below ready-to-eat food. Always in a bin or on a liner that catches drips.
Don't overpack. Air needs to circulate. If your fridge is so full that items are touching the back wall and each other on all sides, it's working harder and not staying cold enough in spots.
Leftovers: three to four days max. Label them with the date. When in doubt, throw it out. The cost of replacing leftover soup is significantly less than the cost of food poisoning.
Fridge temp: 37-40°F. If you're not sure yours is accurate, a small fridge thermometer takes the guesswork out.
---
The Screenshot Checklist
Save this. Or screenshot it. Or write it on the back of a grocery receipt. Whatever works.
FRIDGE ZONE SETUP
[ ] Top shelf: leftovers in clear, dated containers
[ ] Eye-level shelf: grab-and-go items (drinks, snacks, washed fruit)
[ ] Middle shelf: meal prep ingredients, cooking staples
[ ] Lowest shelf: kids' snack bin with handle
[ ] Meat drawer/lowest bin: raw meats, contained and lined
[ ] Door top: lazy Susan with condiments
[ ] Door bottom: tall bottles (ketchup, sauces, dressings)
[ ] Produce drawers: items in produce keepers, sorted
CONTAINER RULES
[ ] All bins are clear
[ ] All bins are stackable
[ ] All bins are wipe-clean (smooth surfaces)
[ ] Bins are measured to fit your shelves
RESTOCK RHYTHM
[ ] Full restock once a week (pull everything, wipe, restock)
[ ] Quick check midweek (top off kids' bin, rotate leftovers forward)
[ ] Date all leftovers with tape and marker
[ ] Toss leftovers after 3-4 days
BEFORE GUESTS (3-MINUTE RESET)
[ ] Toss anything past its prime
[ ] Push clutter back, pull nice items forward
[ ] Wipe shelf fronts
[ ] Close the door and walk away
---
That checklist is about as close to a finished system as I can give you without physically coming to your kitchen. Which, to be fair, is also something I do.
The fridge is one of those things nobody thinks of as a design problem. It's just a cold box. You open it, you close it. But your family interacts with it more than almost any other thing in your home. More than your sofa. More than your dining table. And the way it's organized quietly shapes what you eat, what you waste, and how many times someone yells "we have nothing to eat" while staring at a full fridge.
So maybe give it the same attention you'd give a room.
Or at least more attention than you gave it last Tuesday.
*This blog contains affiliate links.
The Inside of My Fridge Is Not Sentimental
As a designer, I'm selective with where I place personal pictures and art. Awards and diplomas are for offices. Novelty knick knacks are for shelf styling. Personal pictures of my family go in bedrooms where they can be treasured. Communal rooms are for stylized art for guests to enjoy.
With onnnne exception.
My refrigerator.
The outside of it, I mean. That's where all the kid artwork lives, the random funny family pics, the travel postcards from that trip to Savannah where my daughter tried shrimp and gagged so dramatically a waiter came over. My kitchen is styled, but the outside of that fridge is where I want to see life.
The inside, though. That's different.
The inside needs to function for my family. Not nostalgia in there. Just me looking to feed everyone, or more likely, my family looking to feed themselves. My 9-year-old standing there with the door open for 47 seconds, cold air pouring out, scanning like he's browsing Netflix.
So I started treating the inside of my fridge the way I treat a room. Zones. Flow. Making sure the things you reach for most are the easiest to grab.
And honestly, it changed how we eat.
Here are some ways to make it work for you.
---
Shop This Room (Well, This Fridge)
Before we get into the system, here's what makes it actually hold together week after week:
The bins that make zones possible (clear, stackable, easy to wipe down)
A lazy Susan for condiments (the thing that stops the "where's the mustard" conversation forever)
Glass meal prep containers (you can see what's inside without opening them, which matters more than you think)
A magnetic dry-erase board for tracking what needs restocking
Removable fridge shelf liners (for when the yogurt inevitably tips over)
A kid-friendly snack bin they can pull out on their own
Egg holder with a lid (ditch the cardboard carton, trust me)
---
Think of Your Fridge Like a Floor Plan
When I design a living room, I don't just throw furniture in and hope the traffic pattern works. I think about what someone does first when they walk in. Where their eyes go. What they need to reach.
Your fridge is the same thing.
Every time someone opens that door, they're making a decision. Usually a fast one. And if everything is crammed in randomly, the decision defaults to "I don't know what we have" or "I'll just grab the cheese."
So instead, we zone it.
---
The Five Zones
Zone 1: Grab-and-Go (eye level, front and center)
This is the most valuable real estate in your fridge. Right at eye level, front of the shelf. This is where you put the things your family reaches for daily without thinking.
Drinks. Yogurt. Cheese sticks. Fruit that's already washed.
For us, this shelf has a clear bin with string cheese, a small container of washed grapes, and whatever drinks are chilled. My kids can open the fridge and grab something without asking me. That's the whole point.
Zone 2: Leftovers (upper shelf, visible)
Leftovers go on the upper shelf in glass containers. Not tucked in the back. Not buried under last week's takeout box.
Upper shelf, front row.
Here's why: leftovers are the first thing to get wasted. They get pushed back, forgotten, discovered two weeks later in a state that makes you question your life choices. Keeping them visible and at the top means they get eaten. Which is the point.
I also keep a small piece of masking tape on each container with the date. Nothing fancy. Just a roll of painter's tape and a Sharpie in the kitchen drawer. Three days is my rule. After that, it goes.
Zone 3: Meal Prep and Cooking Ingredients (middle shelf)
This is where the raw ingredients for this week's meals live. The chicken you're thawing for tomorrow. The vegetables you prepped on Sunday. The block of parmesan you'll grate over pasta on Wednesday.
I keep raw meats in a dedicated bin with a liner, always on the lowest shelf of this zone or in the dedicated meat drawer. Raw meat should never sit above ready-to-eat food. That's not me being fussy. That's just food safety. A leak from raw chicken onto your strawberries will ruin a Tuesday fast.
Quick note on airflow: don't overpack this shelf. Fridges need air circulating to keep everything at the right temperature. If you're playing Tetris to close the door, you've got too much in there. Cold air needs to move.
[IMAGE 2: Close-up of middle shelf showing meal prep containers neatly arranged with visible contents, a small bin for raw meat on the lowest level, and breathing room between items]
Zone 4: Condiments and Sauces (door shelves + lazy Susan)
The door is the warmest part of the fridge, which is why milk shouldn't live there (I know, I know, everyone puts milk in the door). The door is perfect for condiments, sauces, dressings, and anything with enough vinegar or preservatives to handle slight temperature swings.
A lazy Susan on the top door shelf is the single best $12 you'll spend. You spin it, you find the sriracha. No more digging behind seven bottles of salad dressing you bought because you forgot you already had three.
For the bottom door shelf, that's where the tall bottles go. Ketchup, soy sauce, the bottle of ranch that weighs more than a newborn.
Zone 5: The Kids' Zone (lowest shelf)
This one changed our mornings.
The lowest shelf gets a bin with a handle that's stocked with approved snacks and drinks. My kids know they can grab from that bin anytime without asking. Applesauce pouches. A small water bottle. Cheese. Whatever I put in there that week.
It's at their height. They can reach it. They can pull the whole bin out like a drawer, pick what they want, and slide it back.
This alone cut the "Mom, can I have a snack?" frequency in half. Which, if you have kids, you know that question comes roughly every 11 minutes.
---
The Container Rules
Not all containers belong in a fridge. Here's what works and what doesn't.
Clear. Always clear. If you can't see what's inside, it gets forgotten. That's just how brains work. Those gorgeous ceramic containers look beautiful on a counter but they're a black hole in a fridge.
Stackable. Vertical space is real estate. Stackable bins let you use all of it without things toppling.
Easy to wipe. Smooth surfaces, no weird grooves or textures that trap grime. You want to be able to take a bin out, wipe it with a damp cloth, and put it back in 30 seconds.
Right-sized. Oversized bins waste shelf space. Measure your shelves before you buy. I measured mine at 11 inches deep and 15 inches wide, and knowing those numbers saved me from returning three sets of organizers. Grab a measuring tape and just check.
---
The Labeling System (Keep It Stupid Simple)
You do not need a label maker for your fridge. You just don't.
Painter's tape and a Sharpie. Date on leftovers. A small label on each bin if you want ("snacks," "prep," "drinks"). That's it.
If you're someone who genuinely enjoys the label maker life, go for it. A small portable one does look cleaner. I won't pretend it doesn't. Just don't let the labeling project become the reason you never finish organizing the fridge.
---
The Restock Rhythm
An organized fridge without a restock habit is just a pretty fridge that slowly descends into chaos. I've watched it happen in my own kitchen approximately one hundred times.
Here's what works for us:
Once a week (Sunday or Monday): Full restock. Pull everything out. Wipe the shelves. Toss anything past its date. Restock the zones from your grocery run. This takes about 20 minutes. Put on a podcast. It goes fast.
Midweek (Wednesday or Thursday): Quick check. Top off the kids' bin. Move any leftovers that need eating to the front. Check the produce keepers. This takes five minutes.
That's it. Twice a week. It sounds like a lot until you realize you're already opening the fridge 14 times a day anyway. You're just being slightly more intentional about two of those times.
---
The "Before Guests" Reset
You know the moment. Someone's coming over in 20 minutes and you realize they might open your fridge for a drink and see the state of things.
Here's the three-minute reset:
Toss anything visibly past its prime (you know the items, don't think too hard)
Push everything toward the back, pull the "nice" stuff forward (the sparkling water, the fancy cheese)
Wipe down the front of the shelves where drips have accumulated
Close the door
It's not deep cleaning. It's staging. And honestly, that tracks with how I approach most rooms before company comes.
---
This is exactly what I do for clients. Want me to design your room like this? Whether it's a kitchen layout, a living room that actually works, or yes, a fridge system, I design with function first. Contact Me to get started, or take the Style Discovery to figure out your unique style.
---
A Few Food Safety Things (Lightly, I Promise)
I'm not a food scientist. I just don't want your family getting sick because of a layout choice.
Raw meat goes on the lowest shelf or in a contained drawer. Always below ready-to-eat food. Always in a bin or on a liner that catches drips.
Don't overpack. Air needs to circulate. If your fridge is so full that items are touching the back wall and each other on all sides, it's working harder and not staying cold enough in spots.
Leftovers: three to four days max. Label them with the date. When in doubt, throw it out. The cost of replacing leftover soup is significantly less than the cost of food poisoning.
Fridge temp: 37-40°F. If you're not sure yours is accurate, a small fridge thermometer takes the guesswork out.
---
The Screenshot Checklist
Save this. Or screenshot it. Or write it on the back of a grocery receipt. Whatever works.
FRIDGE ZONE SETUP
[ ] Top shelf: leftovers in clear, dated containers
[ ] Eye-level shelf: grab-and-go items (drinks, snacks, washed fruit)
[ ] Middle shelf: meal prep ingredients, cooking staples
[ ] Lowest shelf: kids' snack bin with handle
[ ] Meat drawer/lowest bin: raw meats, contained and lined
[ ] Door top: lazy Susan with condiments
[ ] Door bottom: tall bottles (ketchup, sauces, dressings)
[ ] Produce drawers: items in produce keepers, sorted
CONTAINER RULES
[ ] All bins are clear
[ ] All bins are stackable
[ ] All bins are wipe-clean (smooth surfaces)
[ ] Bins are measured to fit your shelves
RESTOCK RHYTHM
[ ] Full restock once a week (pull everything, wipe, restock)
[ ] Quick check midweek (top off kids' bin, rotate leftovers forward)
[ ] Date all leftovers with tape and marker
[ ] Toss leftovers after 3-4 days
BEFORE GUESTS (3-MINUTE RESET)
[ ] Toss anything past its prime
[ ] Push clutter back, pull nice items forward
[ ] Wipe shelf fronts
[ ] Close the door and walk away
---
That checklist is about as close to a finished system as I can give you without physically coming to your kitchen. Which, to be fair, is also something I do.
The fridge is one of those things nobody thinks of as a design problem. It's just a cold box. You open it, you close it. But your family interacts with it more than almost any other thing in your home. More than your sofa. More than your dining table. And the way it's organized quietly shapes what you eat, what you waste, and how many times someone yells "we have nothing to eat" while staring at a full fridge.
So maybe give it the same attention you'd give a room.
Or at least more attention than you gave it last Tuesday.
Other Blogs
Other Similar Blogs
Your go-to destination for insightful articles, tips, and inspiration on all things landscaping and outdoor living
Other Blogs
Other Similar Blogs
Your go-to destination for insightful articles, tips, and inspiration on all things landscaping and outdoor living
Other Blogs
Other Similar Blogs
Your go-to destination for insightful articles, tips, and inspiration on all things landscaping and outdoor living


Join our newsletter list
Sign up to get the most recent blog articles in your email every week.